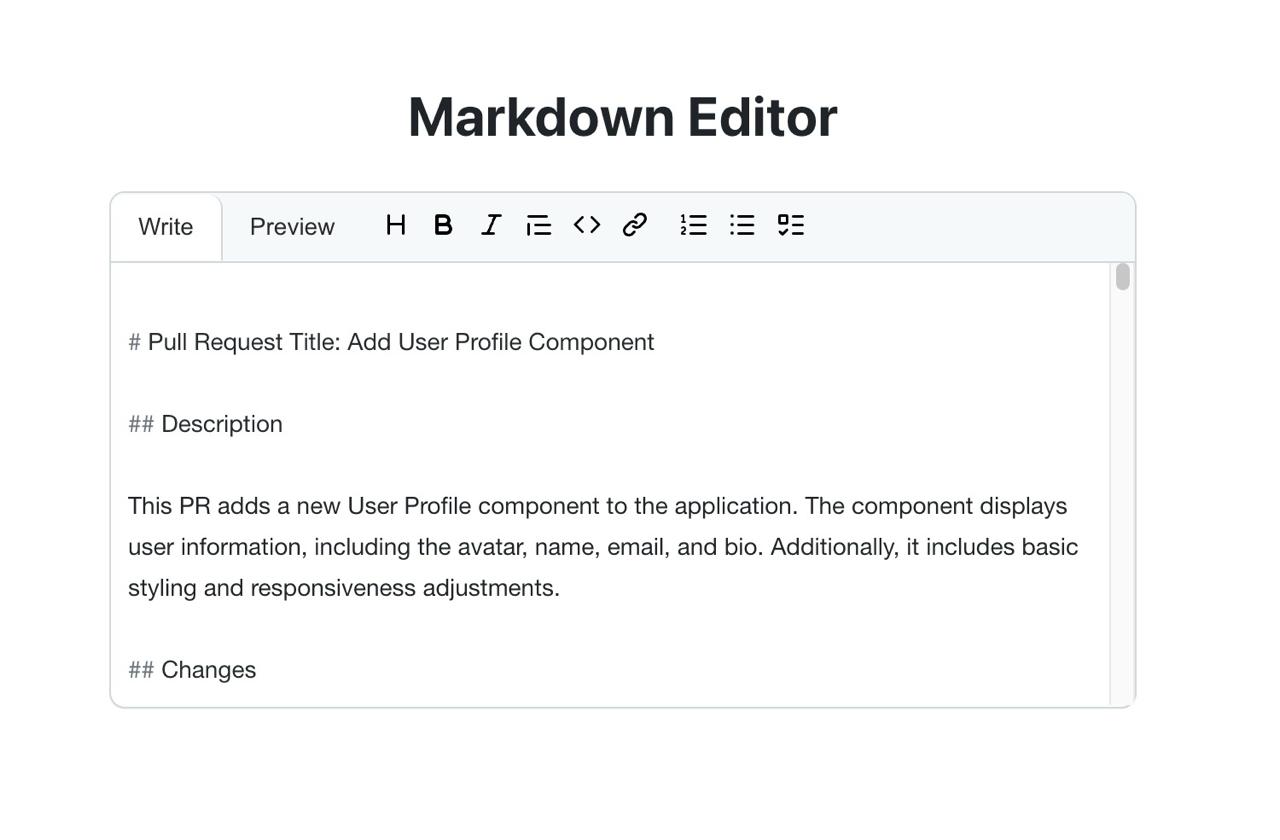
👋 If you’re looking to add a user-friendly markdown editor to your React project, you’re in luck. We’ll be diving into @uiw/react-md-editor, a powerful library that simplifies the creation of markdown editors. By the end of this post, we’ll have recreated a markdown editor similar to the one you use when writing comments on GitHub pull requests! The repo is here and the live website here.

Why pick @uiw/react-md-editor?
@uiw/react-md-editor is a library that gives you a fully-featured markdown editor out of the box. It’s ideal for scenarios where you need to provide users with a straightforward way to enter and format text, such as in comment sections.
Some cool features include:
- 📝 Live, preview and diff mode
- 🎨 Customizable toolbar with your own styles
Getting Started
First things first, let’s install the package:
npm install @uiw/react-md-editor
# or
yarn add @uiw/react-md-editor
Now, let’s create a basic markdown editor in a React component:
import React, { useState } from "react";
import MDEditor from "@uiw/react-md-editor";

const MarkdownEditor: React.FC = () => {
  const [value, setValue] = useState("**Hello world!!!**");

  return (
    <div className="container">
      <MDEditor value={value} onChange={(val) => setValue(val || "")} />
    </div>
  );
};

export default MarkdownEditor;
Just like that, you’ve got a functional markdown editor! 🎉
Customizing Your Editor
Want to add or remove toolbar items? Here’s how you can customize the toolbar:
import React, { useState } from "react";
import MDEditor, { commands } from "@uiw/react-md-editor";

const CustomEditor: React.FC = () => {
  const [value, setValue] = useState("# Your custom markdown here");

  return (
    <MDEditor
      value={value}
      onChange={(val) => setValue(val || "")}
      commands={[
        commands.bold,
        commands.italic,
        commands.link,
        // Add or remove commands as needed
      ]}
    />
  );
};

export default MarkdownEditor;
Want to add your own icons ? You can do that too. Here’s an example with a custom bold command:
import { BoldIcon } from "../../assets/BoldIcon";

const customBoldCommand = {
  ...commands.bold,
  icon: <BoldIcon />,
};

return (
  <MDEditor
    value={value}
    onChange={(val) => setValue(val || "")}
    commands={[customBoldCommand, commands.italic, commands.link]}
  />
);
Want to use text instead of icons ? Want to have access to the current mode (edit or preview) and change it programmatically ? First you need to create the component that will be used as a button in the toolbar:
const PreviewButton = () => {
  const { preview, dispatch } = useContext(EditorContext);
  const click = () => {
    if (dispatch) {
      dispatch({
        preview: "preview",
      });
    }
  };
  return <button onClick={click}>Preview</button>;
};
This component represents the “Preview” tab in a dual-mode markdown editor, mimicking the interface you’d find when commenting on GitHub. It allows users to switch between composing markdown (“Write” mode) and viewing the formatted result (“Preview” mode).
The component uses React’s useContext hook to access preview and dispatch from an EditorContext. It defines a click function that dispatches an action to set the preview state to “preview” when the button is clicked.
After creating your custom button component, you can incorporate it into an object that defines a new preview command for the markdown editor. This object structure allows you to seamlessly integrate your custom functionality into the editor’s toolbar.
const customPreviewCommand = {
  name: "custom-preview",
  keyCommand: "custom-preview",
  buttonProps: { "aria-label": "Generate Preview" },
  icon: <PreviewButton />,
};

return (
  <MDEditor
    value={value}
    onChange={(val) => setValue(val || "")}
    commands={[
      customBoldCommand,
      commands.italic,
      commands.link,
      customPreviewCommand,
    ]}
  />
);
Wrapping Up
@uiw/react-md-editor is a fantastic library that can save you tons of time when implementing markdown editors in your React projects. Whether you’re building a blog platform, a documentation site, or just need a simple way to handle formatted text input, this library has got you covered.
Have you used @uiw/react-md-editor in your projects? Drop a comment below. The repo is here and the live website here.
Happy coding 👨💻👩💻